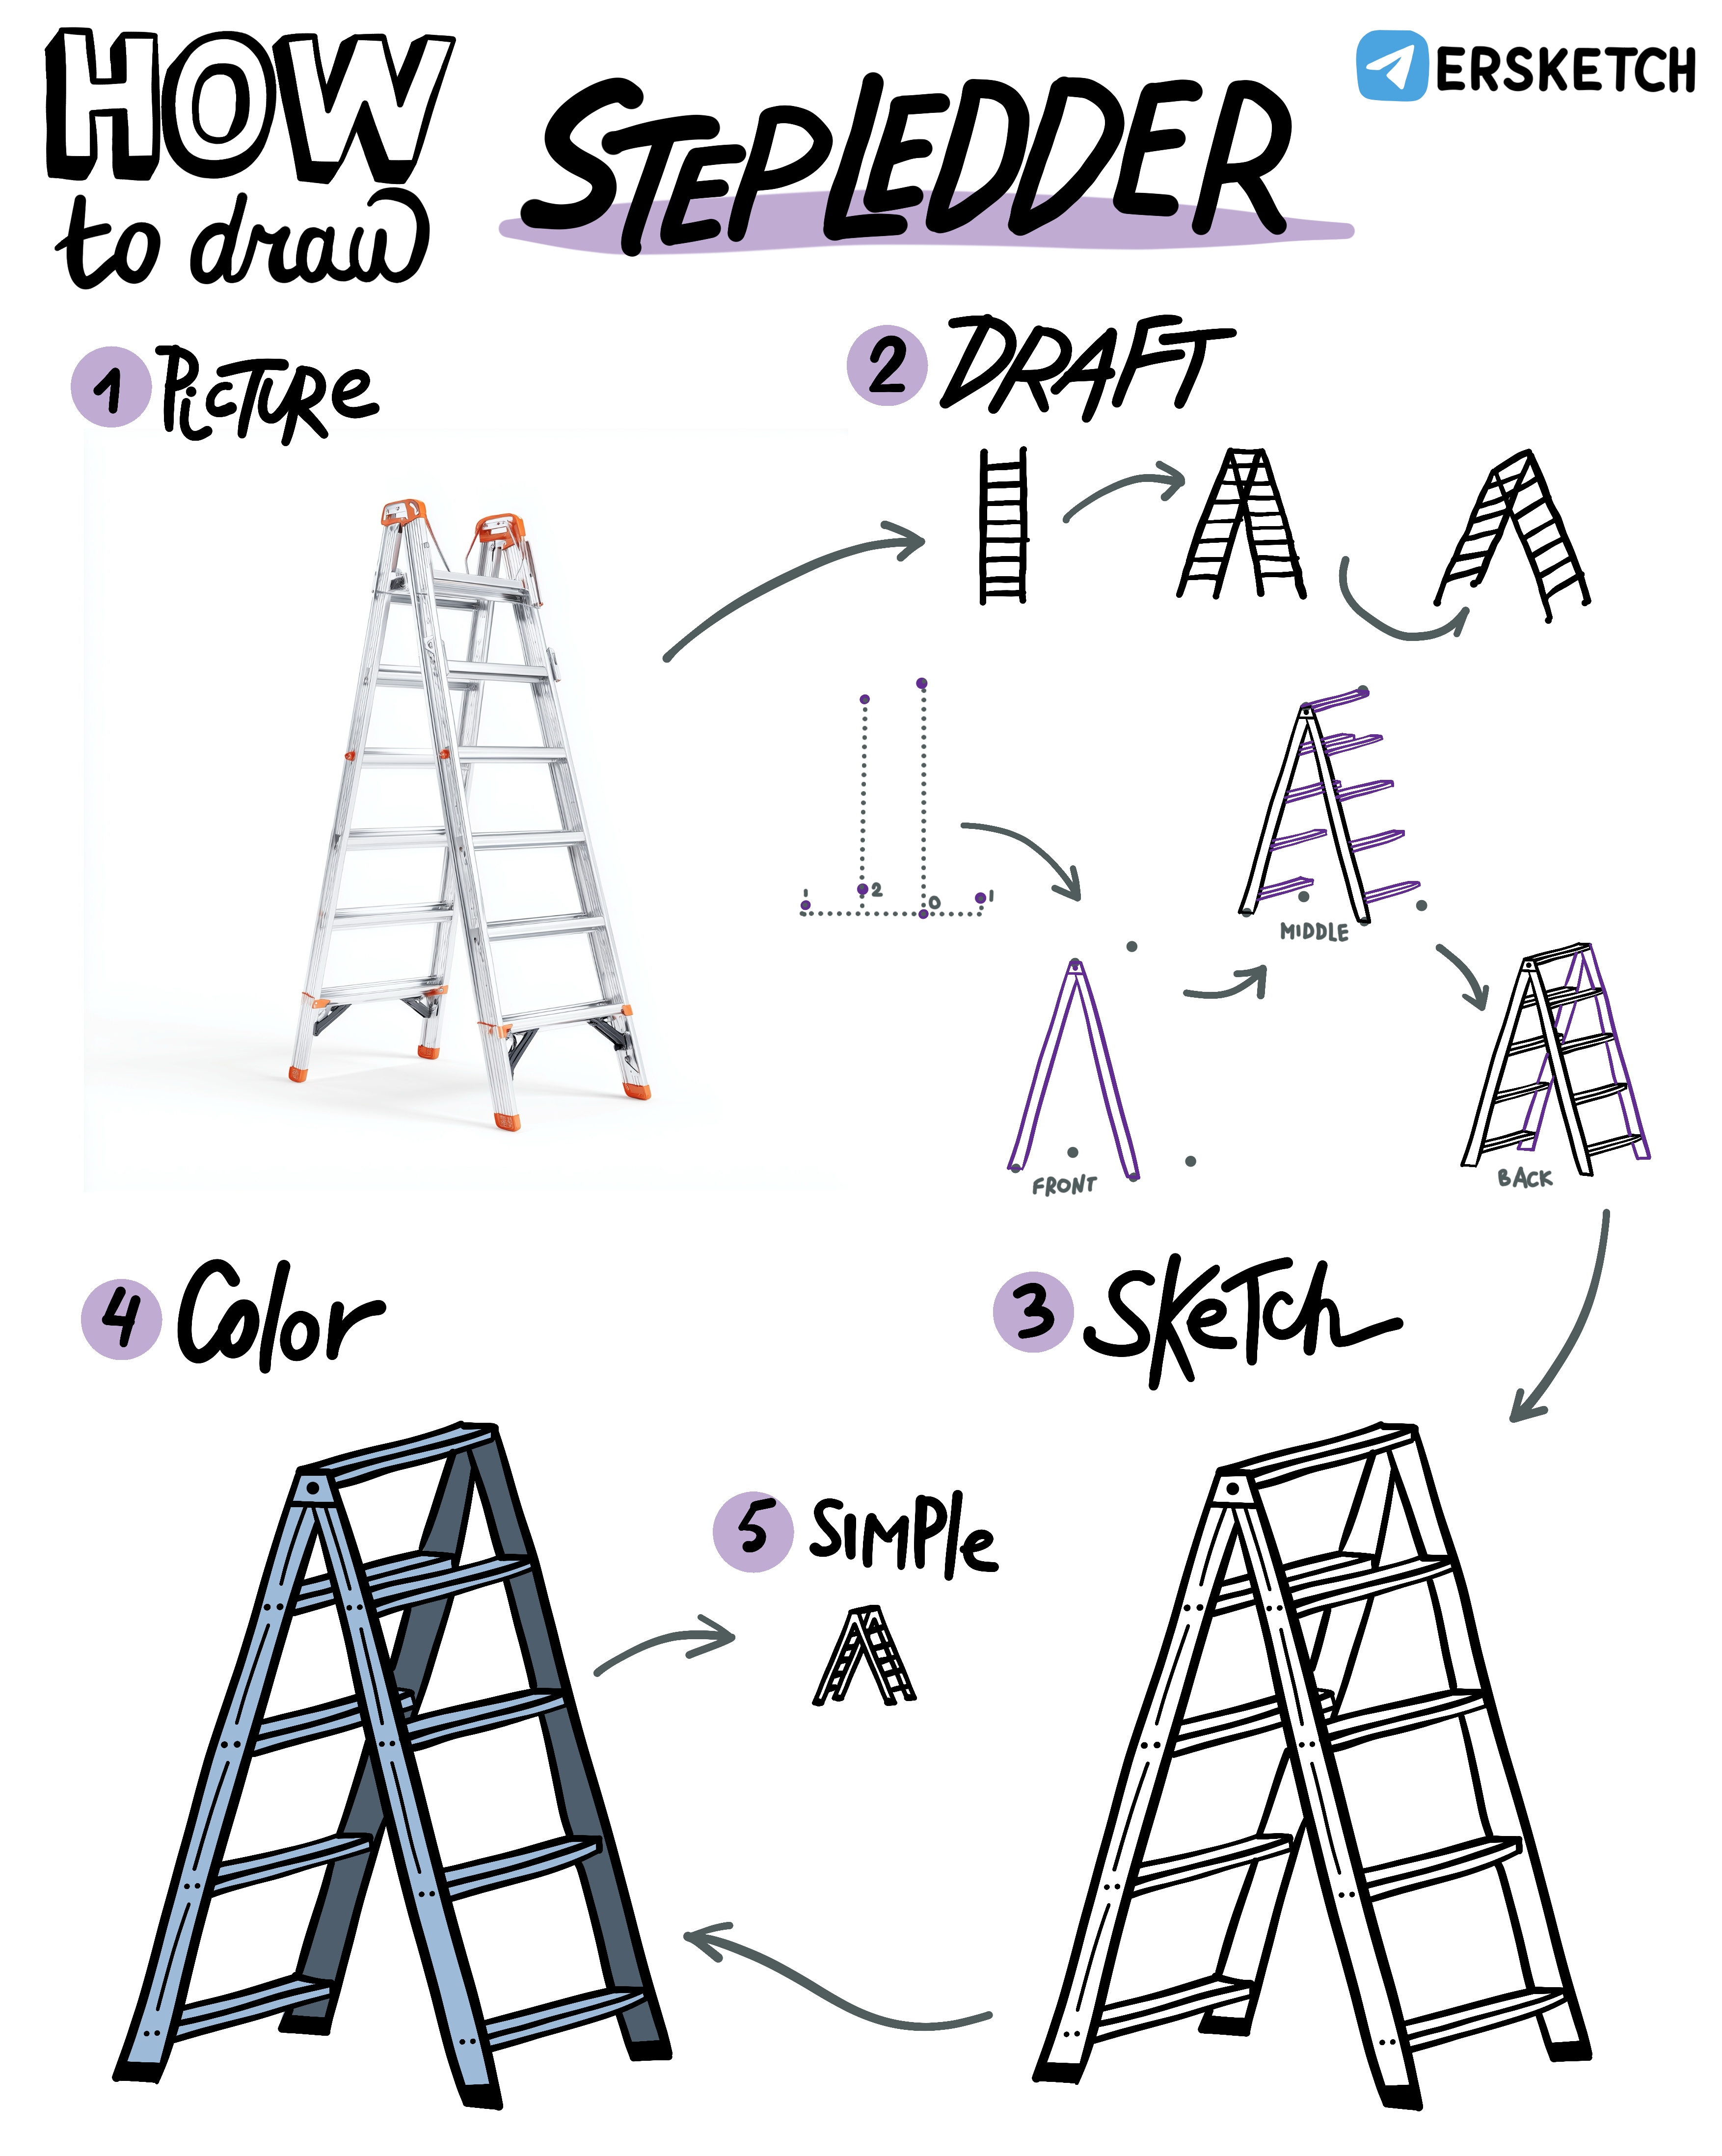
Today we'll be drawing a stepladder. The task turned out to be unexpectedly difficult, so get ready. To make the ladder look good, we need to draw it in projection. And to avoid erasing extra lines, let's try to do this in layers.
First, we need six points that we'll use as references for our drawing. Imagine a horizontal line. Place a point at a small distance above the line. Put the next point to the right of the first one, with its distance from the line being twice as much. We now have our first pair of points. We need two more pairs.
Place the second pair of points to the right of the first pair and one "unit" lower (the third point will lie on the line, and the fourth will be at the same distance from the line as the first point).
The third pair of points will be significantly higher vertically than the first two pairs and exactly between them horizontally. It should look like the illustration.
Now let's start drawing the layers. For the left points of each pair, draw a horizontal line. Then connect the ends of the lower lines to the upper one. We've created a triangular structure on the front layer.
Now let's draw the steps. Let's start with the top one. Draw a horizontal line for the second point from the upper pair and connect its ends to the first upper horizontal line. We've created a step. Now draw several more similar steps along each side of the ladder. This will be the middle layer.
The final step is to draw the back, far part of the stepladder. To do this, simply connect the edges of the steps with lines and then extend them down to the upper points of the lower pairs.
And there we have a rather nice and neat ladder. If you want to make it simpler, you can avoid adding width to the steps. This will look fine in a small picture.