ErBlog
-
🔭 Observatory
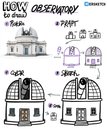
To draw an observatory, you should start with the telescope, which is the most important part. Around it is the roof, and beneath the roof is the observatory building. -
🐉 Dragon
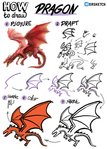
Can dragons fly without magic? Let's try to figure it out. I found a random formula on the internet for calculating bird wing area based on body mass: S≈0.15⋅m^2/3. A dragon, even the smallest one, should weigh no less than a horse. Otherwise, how could it carry off a princess or at least a donkey? The average weight of a horse is 500 kg. If we plug this into the formula, we get approximately 12 square meters of wings, which should be about 6 times larger than the size of the dragon itself. And here we have problems. First, this formula is for birds, and dragons most likely don't have feathers, hollow bones, and other adaptations that birds have developed to be lighter. Second, wings of this size would significantly affect the mass themselves. The catch is that as wing size increases, mass grows faster than lift. So it turns out that without magic, dragons can fly only backwards using jet propulsion from their mouths; wings alone wouldn't be enough for them. But I'm getting distracted. We'll start drawing it with the most difficult part—the wing. Try to convey the shape of an extended S with a very long top. Then we'll add the inner part of the membranous wing to it. When the wing starts to take shape, you can try to draw the dragon's body and the second wing. After that, all that remains is to add details. -
🚜 Harvester
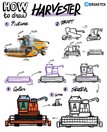
The harvester is an amazingly complex and multifunctional machine. The blade cuts the stems, then they are captured by the feeder, go inside, where the grains are separated from the stems, and all this happens inside the harvester, while only cleaned grain comes out. I thought it would be easier to draw the harvester from the front view. So I first drew the cutter and feeder, then added the wheels and the harvester body behind it, and some details. If you study photos of a harvester, you can see what it has. Some kind of cabin, some kind of ladder to get into the cabin, a grain container on top. If you arrange all this somehow, you get a recognizable image. -
Reflective Travel Sketchnotes
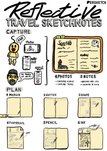
Today I attended Mike Rowdy's webinar titled "Reflective Travel Sketchnotes." The idea is that during travel, it's not always possible to sit down at the end of each day and draw a sketch. Either because the day was very intense, or because you now have two children. In this case, you can take photos, make text notes, or record something on your voice recorder at the end of the day to capture moments that can later be transferred into a sketch. The second part was about step-by-step instructions and an example of how to create a travel sketch. This, by the way, turned out to be quite similar to how I made my own travel sketches. -
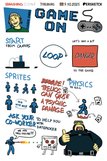
Game On
Sketchnote for the presentation by Cassie Evans, instead of which she made a game. -
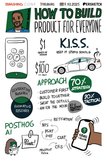
How to Build a Product for Everyone
Sketchnote for the talk about how to benefit from research by Kevin Hawkins. -
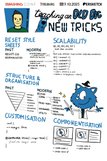
Teaching an Old Dog New Tricks
Sketchnote for Manuel Matuzović's talk about his research on modern CSS capabilities. -
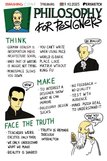
Philosophy for Designers
Sketchnote for Oliver Reichenstein's talk about how the mouse interferes with thinking, and the world resembles the matrix without kung-fu. -
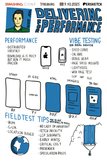
Delivering for Performance
Sketchnote for Scott Jehl's talk about how to fit a waterfall into a bottle. -
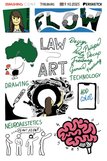
Flow
My sketchnote for the first talk of the second day of Smashing Conf. Gemma O'Brien talked about her research on the flow state. -
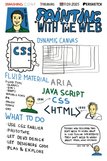
Painting With the Web
Sketchnote from Matthias Ott's talk about how the web is not paper. The web is made of much more interesting materials. If you play with them a little, you can feel it. -
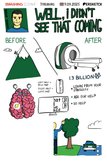
Well, I Didn't See That Coming!
Sketchnote with a story about how to feel the value of accessibility by Kardo Ayoub. -
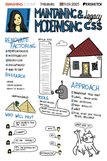
Maintaining and Modernising Legacy CSS
Sketchnote for a talk about CSS repair and refactoring by Ana Rodrigues. -

Why Aren't People Using My Dashboard?
Sketchnote for Nick Desbarats' talk, which explains what makes a good dashboard different from a Christmas tree. -
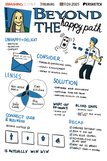
Beyond the Happy Path
Sketchnote for the wonderful, kind talk by Emily Anderson about how thoughtless notifications can cause harm. -

Is Atomic Design Dead?
Sketchnote for Brad Frost's talk about how to stop making your own datepicker and be like Phil Collins at Smashing Conf. -
♟️ Chess
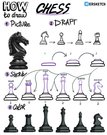
The bottom part of all chess pieces is very similar. One might say identical. Let's draw the bottom part separately. It looks like a layered cake made of different pancakes. Now, using this base, we'll draw each of the pieces. The simplest is the pawn. It has a concave stem with a ball on top. The bishop isn't much more complex. Basically like a pawn, but with a spike on top instead of a ball. Next in complexity is the king. It's large. It has a cross on top of its ball. The queen is slightly more complex. The wavy edges of the crown are quite intricate. The rook looks simple and angular, but drawing the tower is difficult, especially in three dimensions. And the most challenging (if you, like me, can't draw horses) is the knight. I'll remind you, a horse without a mane looks like a dinosaur. So draw a dinosaur and add a mane to it. And there we have our chess set. -
SmashingConf Freiburg 2025
SmashingConf is just a week away! Looking forward to the trip. And I'll also be giving a small talk with pictures at the Jam Session. -
🦠 Virus
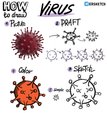
Thanks to recent events, we now all know exactly what a virus looks like. Let's draw it. We'll start with an imaginary circle. Or a circle drawn in pencil, because we'll need to erase parts later. Around this circle, let's draw several small circles and a few more inside. The next step will be to draw legs from these circles pointing toward the center of the circle. The farther a small circle is from the center, the longer its leg should be. And each leg should be wider at the base than at the top. Now, if your circle was drawn in pencil, erase the lines that are overlapped by the legs. If you had an imaginary circle, draw in the lines that form the circle. Finally, add legs positioned at the back of the circle. That means drawing a few more circles with legs that connect to the main circle. Together, these legs form a crown-like structure around the circle, which is why this virus is called a coronavirus. -
🫖 Teapot
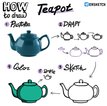
Between the Earth and Mars there is a china teapot revolving about the sun in an elliptical orbit. The teapot is too small to be revealed even by our most powerful telescopes. Let's start drawing it from the lid. This is the easiest way to maintain proportions, and nothing will need to be erased. The second step is to draw the bulbous body of the teapot under the lid. From the lid, the line goes slightly down, and then symmetrically follows an oval shape to the opposite side of the lid. All that remains is to add the handle, spout, and base. -
🪁 Kite
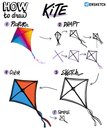
Today we're drawing a kite. It's not difficult to draw, but there are some tricks. Let's start with the frame. The frame is a cross, but since the kite is flying, its lines are slightly curved from the wind. The skin of the kite is stretched over the cross, its edges are also slightly curved inward. A ribbon flutters at the back as a tail. You can also add shadows and seams for beauty. -
🥁 Drum
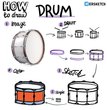
Today we are drawing a drum. A drum consists of two membranes stretched over a rigid frame. Let's draw an oval, and slightly below it - a half-oval. We'll connect the upper and lower ovals with braces. In the upper oval, let's add some depth by drawing an inner wall. We now have a drum. -
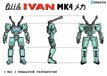
Little Ivan MK4
This is the fourth version of the robot for my son Ivan's birthday cake. For his first birthday, I drew a little robot, and now every year the robot grows along with him. -
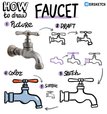
🚰 Faucet
The faucet consists of a tube, a handle, and a mounting. At least, the faucet that we will be drawing. The handle fits into a special part that contains the water-shutoff mechanism, so there is a thickening at the bottom, in the place of the faucet located under the handle. I start drawing the faucet with the tube, with a place for the handle on top and a thickening at the bottom. Then I'll draw the handle on top, the wall mounting, and the tip of the faucet. It turns out to be quite simple. -
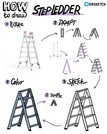
🪜 Stepladder
Today we'll be drawing a stepladder. The task turned out to be unexpectedly difficult, so get ready. To make the ladder look good, we need to draw it in projection. And to avoid erasing extra lines, let's try to do this in layers. First, we need six points that we'll use as references for our drawing. Imagine a horizontal line. Place a point at a small distance above the line. Put the next point to the right of the first one, with its distance from the line being twice as much. We now have our first pair of points. We need two more pairs. Place the second pair of points to the right of the first pair and one "unit" lower (the third point will lie on the line, and the fourth will be at the same distance from the line as the first point). The third pair of points will be significantly higher vertically than the first two pairs and exactly between them horizontally. It should look like the illustration. Now let's start drawing the layers. For the left points of each pair, draw a horizontal line. Then connect the ends of the lower lines to the upper one. We've created a triangular structure on the front layer. Now let's draw the steps. Let's start with the top one. Draw a horizontal line for the second point from the upper pair and connect its ends to the first upper horizontal line. We've created a step. Now draw several more similar steps along each side of the ladder. This will be the middle layer. The final step is to draw the back, far part of the stepladder. To do this, simply connect the edges of the steps with lines and then extend them down to the upper points of the lower pairs. And there we have a rather nice and neat ladder. If you want to make it simpler, you can avoid adding width to the steps. This will look fine in a small picture.